¶ Introducción
Vamos a proceder a explicar cómo construir una imagen de contenedor desde un pc o portátil, con docker client y luego subirlo al servicio de registro de artefactos https://containerhub.rstools.csic.es (en adelante a containerhub).
¶ 1. Construir una imagen mediante docker client
En primer lugar vamos a proceder a construir la imagen de contenedor dentro de nuestro propio PC o portátil. Para ello presuponemos que hemos desarrollado el Docker file, por ejemplo, como el siguiente.
usuario@portatil:~/drago-hpc-containers/centos7# cat Dockerfile
# ch-test-scope: standard
FROM centos:7

# This image has two purposes: (1) demonstrate we can build a Centos 7 image
# and (2) provide a build environment for Charliecloud Centos 7 RPMs.
#
# Quirks:
#
#   1. Install the dnf ovl plugin to work around RPMDB corruption when
#      building images with Docker and the OverlayFS storage driver.
#
#   2. Install packages needed to build el7 rpms.
#
#   3. Issue #1103: Install libarchive to resolve cmake bug
#
RUN yum install -y --setopt=install_weak_deps=false \
                epel-release \
 && yum install -y --setopt=install_weak_deps=false \
                autoconf \
                automake \
                gcc \
                git \
                libarchive \
                make \
        bzip2 \
                python3 \
                python3-devel \
                rpm-build \
                rpmlint \
                rsync \
                squashfs-tools \
                wget \
 && yum clean all

# Need wheel to install bundled Lark, and the RPM version doesn't work.
RUN pip3 install wheel

# AlmaLinux's linker doesn't search these paths by default; add them because we
# will install stuff later into /usr/local.
RUN echo "/usr/local/lib" > /etc/ld.so.conf.d/usrlocal.conf \
 && echo "/usr/local/lib64" >> /etc/ld.so.conf.d/usrlocal.conf \
 && ldconfig
usuario@portatil:~/drago-hpc-containers/centos7#
A continuación procedemos a construir la imagen.
usuario@portatil:/drago-hpc-containers/centos7# ls
Dockerfile
usuario@portatil:/drago-hpc-containers/centos7# docker build -t centos7 .
usuario@portatil:/drago-hpc-containers# docker image ls
REPOSITORY                                             TAG       IMAGE ID       CREATED         SIZE
containerhub.rstools.csic.es/harbor/hpcdrago/openmpi   2.1.6     e00c1dfa9868   2 weeks ago     650MB
containerhub.rstools.csic.es/hpcdrago/openmpi          2.1.6     e00c1dfa9868   2 weeks ago     650MB
openmpi                                                latest    e00c1dfa9868   2 weeks ago     650MB
centos7                                                latest    2c3a453e4e01   2 weeks ago     424MB
containerhub.rstools.csic.es/hpcdrago/centos7          latest    2c3a453e4e01   2 weeks ago     424MB
jboss/keycloak                                         16.1.0    b23994833c33   12 months ago   755MB
centos                                                 7         eeb6ee3f44bd   16 months ago   204MB
rocker/rstudio                                         3.6.0     f00adfe7ec90   3 years ago     1.36GB
mariadb                                                10.1.19   0c73f0dac69b   6 years ago     390MB
A continuación, vemos la línea donde aparece centos7:latest, y ya nos queda proceder a la subida de la imagen al registro CONTAINERHUB (https://containerhub.rstools.csic.es).
¶ 2. Subir imágenes firmadas mediante servicio notary con docker client a containerhub
Se va a subir una nueva o existente release de imagen de contenedor para su futuro uso en distintos entornos.
En primer lugar, vamos a loguearnos en containerhub, y para ello usamos mismo usuario/contraseña que disponemos en el sistema HPC Drago.
usuario@portatil:/drago-hpc-containers# docker login https://containerhub.rstools.csic.es
Authenticating with existing credentials...
WARNING! Your password will be stored unencrypted in /usuario/.docker/config.json.
Configure a credential helper to remove this warning. See
https://docs.docker.com/engine/reference/commandline/login/#credentials-store

Login Succeeded
Declaramos una serie de variables de entorno para firmar la imagen mediante el servicio notary que se encuentra el el servicio containerhub.
usuario@portatil:/drago-hpc-containers# export DOCKER_CONTENT_TRUST=1
usuario@portatil:/drago-hpc-containers# export DOCKER_CONTENT_TRUST_SERVER=https://notary.rstools.csic.es
usuario@portatil:/drago-hpc-containers# export DOCKER_CONTENT_TRUST_REPOSITORY_PASSPHRASE="prueba"
usuario@portatil:/drago-hpc-containers# export DOCKER_CONTENT_TRUST_ROOT_PASSPHRASE="prueba"
Revisamos la imagen y procedemos a tagear su release.
usuario@portatil:/drago-hpc-containers# docker image ls
REPOSITORY                                             TAG       IMAGE ID       CREATED         SIZE
containerhub.rstools.csic.es/harbor/hpcdrago/openmpi   2.1.6     e00c1dfa9868   2 weeks ago     650MB
containerhub.rstools.csic.es/hpcdrago/openmpi          2.1.6     e00c1dfa9868   2 weeks ago     650MB
openmpi                                                latest    e00c1dfa9868   2 weeks ago     650MB
centos7                                                latest    2c3a453e4e01   2 weeks ago     424MB
containerhub.rstools.csic.es/hpcdrago/centos7          latest    2c3a453e4e01   2 weeks ago     424MB
centos                                                 7         eeb6ee3f44bd   16 months ago   204MB
rocker/rstudio                                         3.6.0     f00adfe7ec90   3 years ago     1.36GB
mariadb                                                10.1.19   0c73f0dac69b   6 years ago     390MB


usuario@portatil:/drago-hpc-containers# docker tag centos7:latest containerhub.rstools.csic.es/hpcdrago/centos7:latest
Finalmente, realizamos la subida. Si queremos depurar dicha subida, ante cualquier problema podemos añadir al comando de abajo la opción --debug.
usuario@portatil:/drago-hpc-containers# docker --debug push containerhub.rstools.csic.es/hpcdrago/centos7:latest
The push refers to repository [containerhub.rstools.csic.es/hpcdrago/centos7]
b06419103fca: Layer already exists
a2267545085d: Layer already exists
c3a138f4afc5: Layer already exists
174f56854903: Layer already exists
latest: digest: sha256:be161c6d24efe3fda3d594a78e404a1eee767f3cd8a4eb17fb429a35cd2764aa size: 1159
Signing and pushing trust metadata
Successfully signed containerhub.rstools.csic.es/hpcdrago/centos7:latest
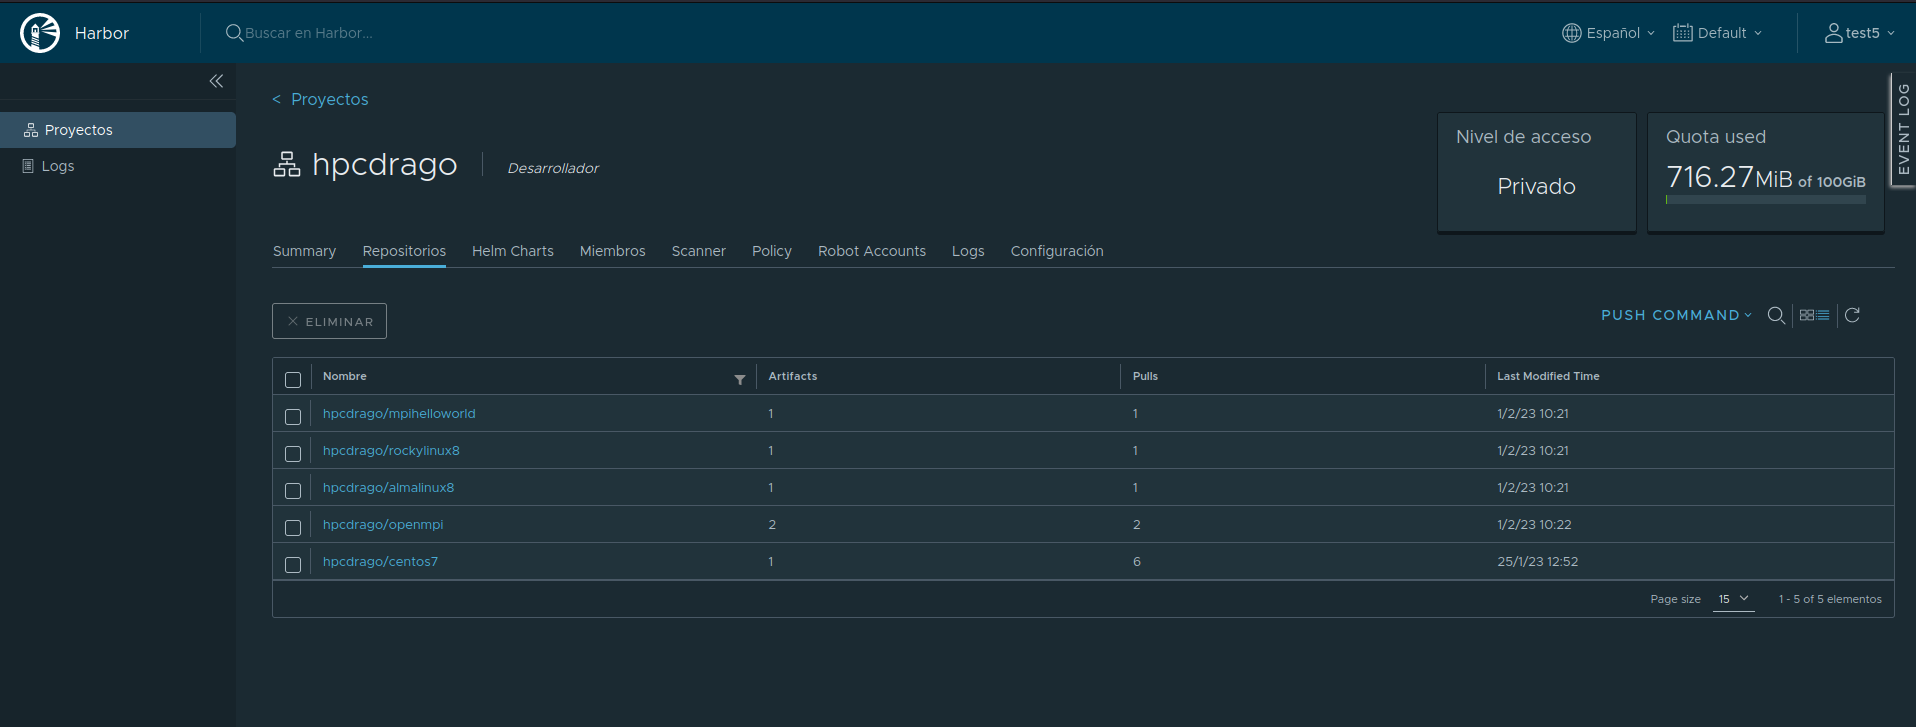
Vemos mensaje de subida exitosa y verificamos a través de la consola web si está ok. Podemos observar que se ha subido.
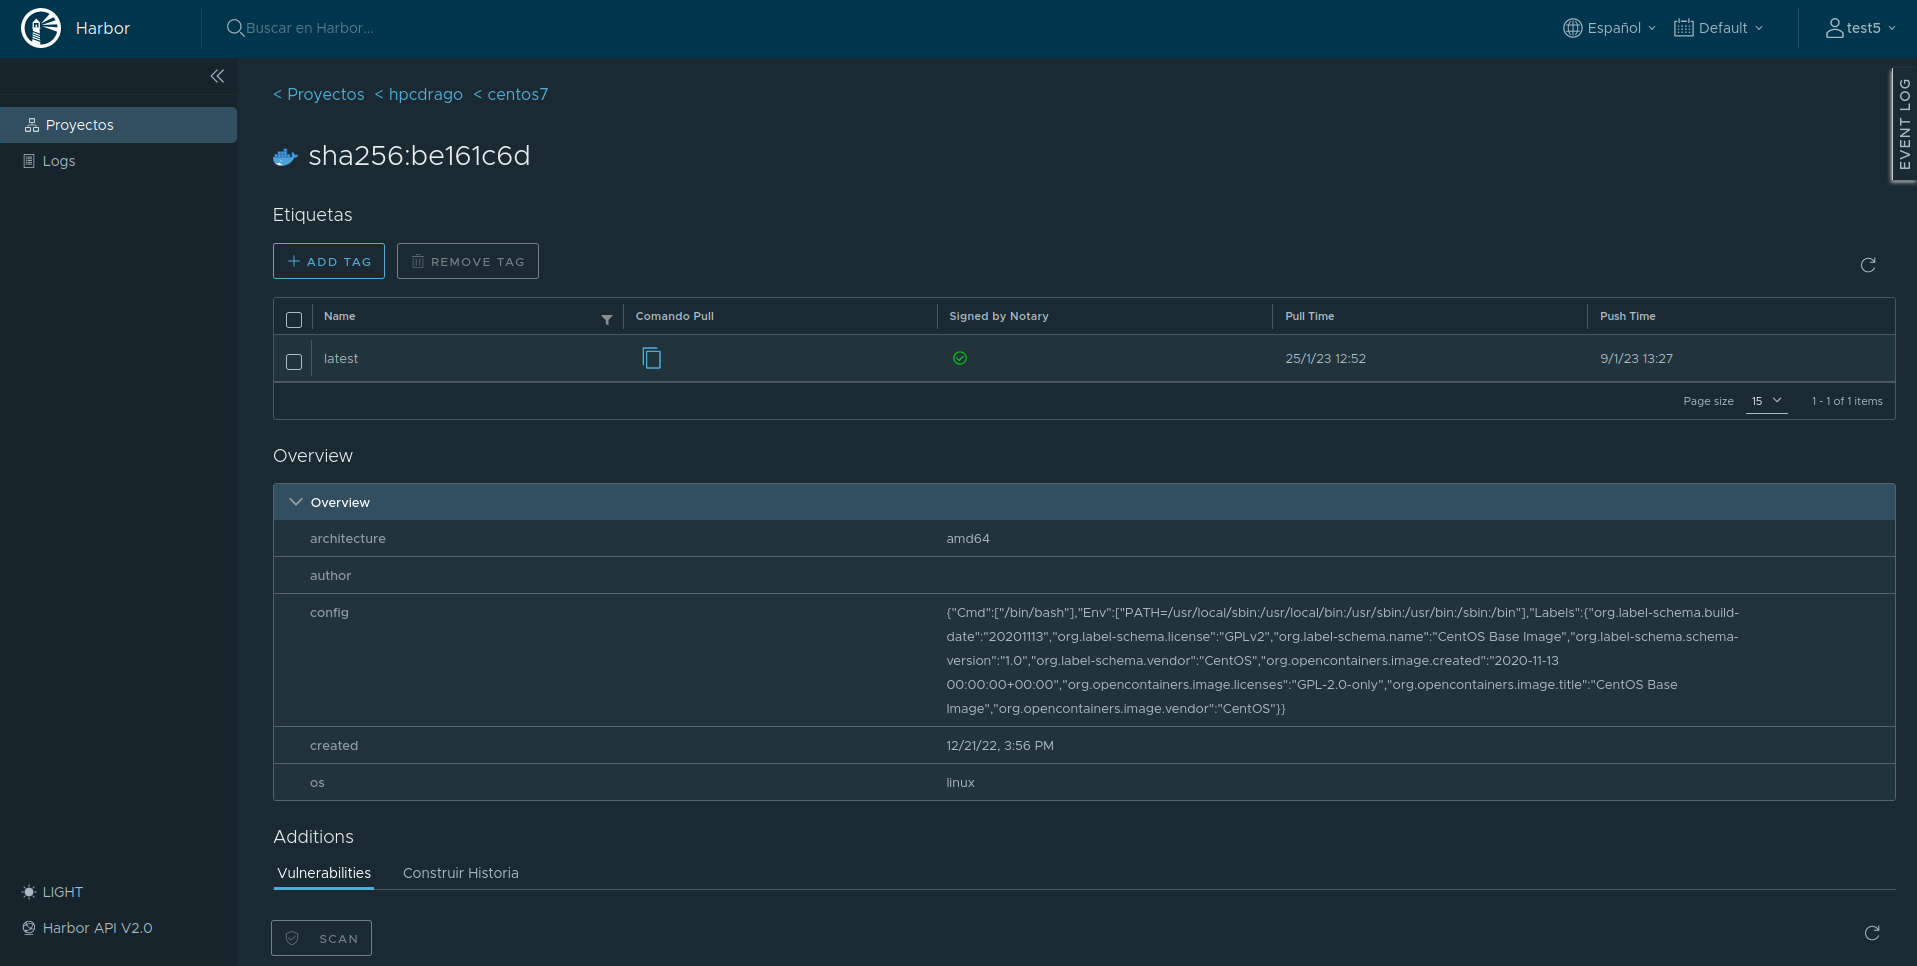
Si pulsamos en la imagen subida podemos llegar a ver las releases disponibles o subidas ya previamente, si hubiera, si ha sido firmado, posibles vulnerabilidades según servicio interno trinity, etc.